Zapier is a tool that allows non-technical users to connect different web apps with each other. You can connect Habitica with any other Zapier app, such as Google Sheets, RescueTime, Evernote, Trello, or GitHub. You can perform actions in other apps based on actions occurring in Habitica, or vice versa.
Please note:This Zapier app has not been reviewed or approved by Zapier for functionality or security.
Task Activity Triggers when a new task is created, updated, deleted, or scored.
New Group Chat Triggers when a new chat appear in a group (party or guild).
Actions:
Create Task Creates a task. A task can be a Habit, Daily, or To-Do.
Score Task Scores a task (Habit, Daily, To-Do, or Reward), including completing a Daily / To-Do (Up), uncompleting a Daily / To-Do (Down), or clicking on a Habit (positive or negative). You have to provide the Task ID of the task to score it. The easiest method of finding a Task ID is to use the Task Adjustor (direct link) and click "toggle developer data" after logging in.
Find Task Find a task by its name. Only exact matches (case insensitive) work.
Using Zapier Without the Habitica Zapier Integration
In addition to using the Habitica app on Zapier, it is also possible for Zapier to interact with Habitica by using its "Webhooks" app to contact Habitica's Application Programming Interface.
This can potentially allow Zapier users to take actions not included in the Zapier Habitica app. For example, see The Keep:Scheduling Quest Starts with Zapier and API, which describes the use of Zapier's Google Calendar and Webhooks apps to start Quests automatically using API's "quests/force-start" call.
Tips & Tricks
General
Because Zapier fetches data periodically (every 5 to 15 minutes), guild/party chats may appear out of order if two or more chat messages get posted during that time. For example, a 12:54pm message may be fetched before a 12:51pm message.
When creating tasks, the Due Date needs to be changed to the UTC time zone in order to appear correctly on the website.
Currently, the Due Date for Create Tasks is not populating correctly for the app (but will show correctly on the website). To fix this, just update the date manually.
When using the Task Activity as a Trigger, in the "Test this Step" complete an action that most represents what you wish to collect, to have the ideal flags available. For instances, if you wish record when you completed your dailies and with what was the streak, complete a daily task so you are able to select the streak tag option.
Zapier currently does not record activity due to croning, ie the effect of miss dailies. You will only know if you have missed a daily when you next complete (score) the daily and checking the streak is 1 or not.
Zapier does not support two-way syncing. Thus, keeping records up to date after the initial Trigger and Action is not currently supported. Think of Zaps as one-way, one-time actions. For more information, see this official article from Zapier.
Google Sheets
Google Sheets must:
have a header record on the first row
not have any blank rows between any records
Times in Habitica are stored in Epoch time. To show correctly in Google Sheets, use the appropriate time-date formatting and:
To convert to UTC, add ts in front of the Time field. For example, ts[Habitica Timestamp]. Note: no equal sign is used.
To convert to your local time, use =[Habitica Timestamp]/86400000+"1 Jan 1970"+[GMT Adjustment]/24, where the [GMT Adjustment] is the number of hours ahead of or behind GMT. For example, PDT is GMT -7, so the formula will be =[Habitica Timestamp]/86400000+"1 Jan 1970" + -7/24.
When using Create Task Action to convert Due Dates to the correct UTC format, use the following formula: =[Excel Field with Date]+([GMT Adjustment]/24). For example, if the time zone is PDT (GMT -7) and the date field is in C2, then the formula will be =C2+(-7/24)
Samples
Copy Party/Guild Chat into Google Sheets
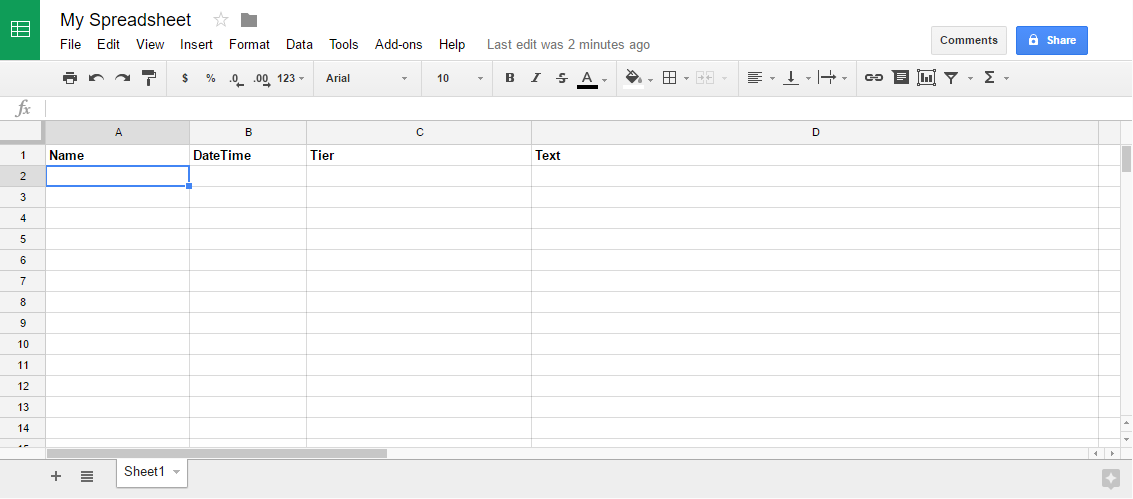
Blank Google Sheet With Header
Create a Google Sheet with the column headings you wish to capture, like Name, Level, Timedatestamp, and Text.
Format the Timedatestamp field using the appropriate time-date formatting.
Go to the Zapier Dashboard. Choose Make a Zap.
Choose Habitica as the Trigger App.
Choose New Group Chat and Save + Continue.
If not already completed, choose Connect to New Account and fill out your UID and API Token, which can be found on the Habitica website via Settings > API.
Select the account and click Save + Continue.
Select either your party or a guild and click Continue.
Click Connect & Continue.
In the guild or party enter one line of chat.
You should get a message saying, "Test Successful!". This will hang till a new chat lines appears. You can see the results by clicking View Your Chat, which will display the last line in the guild. Click Continue.
Choose Google Sheets as your action.
Choose Create Spreadsheet Row.
If not already completed, choose Connect to New Account and fill out your Google username and password.
Select the Account and click Save + Continue.
Select the Spreadsheet and appropriate Worksheet.
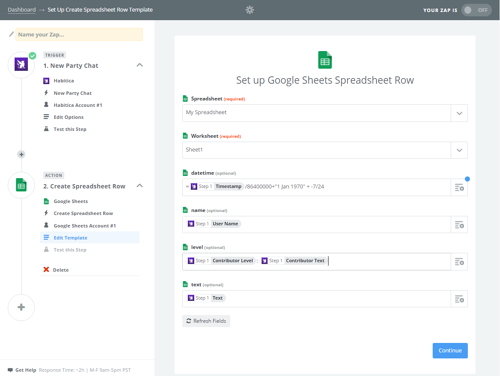
Linking Habitica fields to populate Google Spreadsheet
Fill out Column Details: (These columns may not appear in the same order)
Date/time: =[Step 1 Timestamp]/86400000+"1 Jan 1970" + -7/24 for PDT(GMT-7). Please see Tips & Tricks For Google Sheets for more about formatting timestamps.
You can Test Google Sheets by inserting the last line of chat into your spreadsheet. Click Create & Continue.
You should get a message saying, "Test Successful!" If you do not, please check that there are no blank rows between any records.
Open your spreadsheets and review your results.
The first row may read, "Added by Zapier, ensuring we can access this spreadsheet. Feel free to delete it after you are all set up!" You can delete this row. (Do not just clear the content, but remove the entire row; otherwise, your Zap will stop populating!)
The next line will be the automatically entered line of chat.
Click Finish.
Name your Zap and click Your Zap Is On for it to start collecting data.
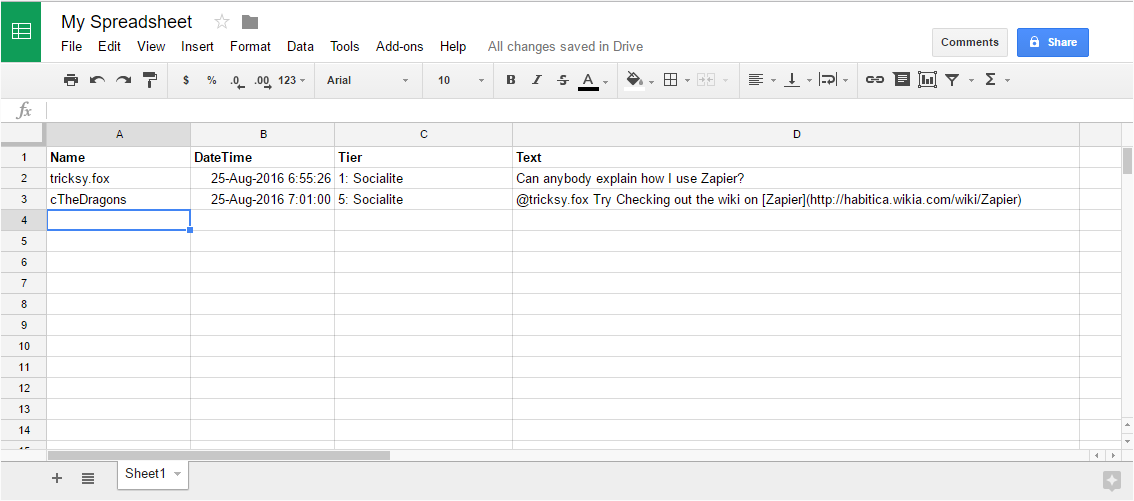
Final Google Sheet With Chat
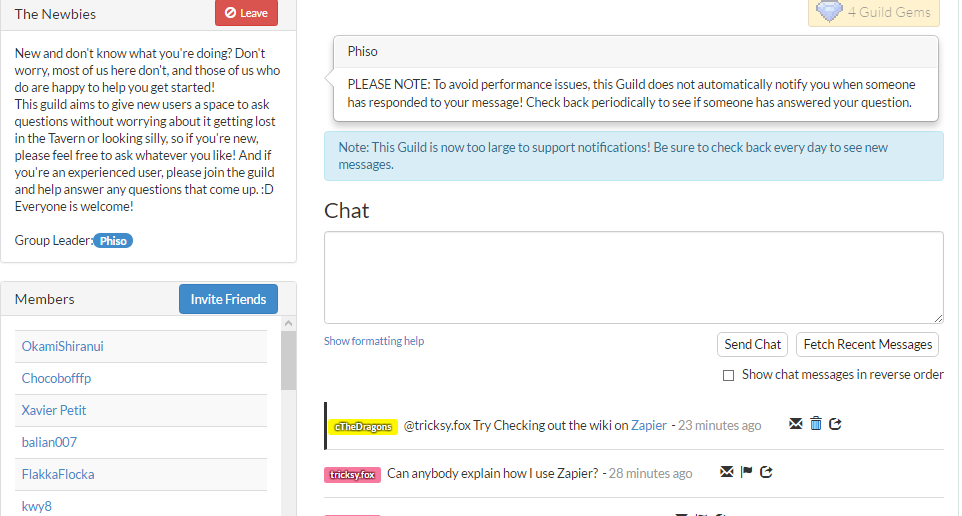
Corresponding Chat for Final Spreadsheet
Load New To-Dos from Google Sheets
This method shows how to load To-Dos when a new row is created. Therefore if there is already an existing list, or if you wish to edit the To-Dos before uploading, edit in a separate document first, and then paste the row into a Google Sheet once the Zap is on.
Google Sheet With one To-Do Task
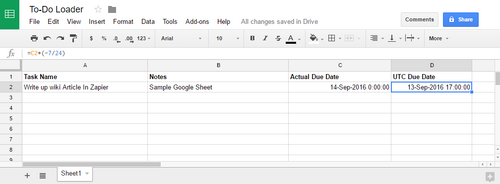
Create a Google Sheet with the following headings: Task Name, Notes, Actual Due Date, UTC Due Date.
Format the Due Date fields with appropriate time-date formatting.
Fill out the Task Name, Notes and Actual Due Date. Only add one To-Do row as subsequent rows will be ignored and not loaded. Add these tasks after creating the Zap.
In the UTC Due Date Field, use =C2+(-7/24) for PDT(GMT-7).
Go to the Zapier Dashboard. Choose Make a Zap.
Choose Google Sheets as the Trigger App.
Choose the Trigger as New Spreadsheet Row and click Save + Continue.
If not already completed, choose Connect to New Account and fill out your Google username and password.
Select the Account and choose Save + Continue.
Select the Spreadsheet and appropriate Worksheet and click Continue.
Click Fetch & Continue to confirm that it is able to read one task.
You can view the spreadsheet row to confirm the data is correct. Click Continue once done.
Choose Habitica as the Action App.
Choose Create Task as your option and click Save + Continue
If not already completed, Choose Connect to New Account and fill out your UID and API Token which can be found on the Habitica website via Settings > API.
Select the account and click Save + Continue.
Fill out Column Details:
Type: To-Do
Task: [Step 1 taskname]
Notes: [Step 1 notes]
Due Date: [Step 1 utcduedate]
Click Continue.
Review it is correct and click Create & Continue
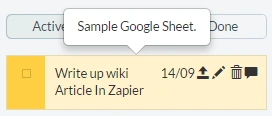
Habitica To-Do Created
Sync your Habitica Account on the App or Website and review your new task.
Click Finish.
Name your Zap and click Your Zap Is On.
Add new rows for new To-Dos as desired, ensuring the UTC Due Date column is populated appropriately.
Add Completed Tasks to Your RescueTime
A premium RescueTime account is required for this (direct link).
Go to the Zapier Dashboard. Choose Make a Zap.
Choose Habitica as the Trigger App.
Choose Task Activity, click Save + Continue.
If not already completed, Choose Connect to New Account and fill out your UID and API Token which can be found on the Habitica website via Settings > API.
Select the account and click Save + Continue.
Select Yes to Scored, and No to all other options
Click Connect + Continue
Click a task so the Test is Successful appears. Click Continue.
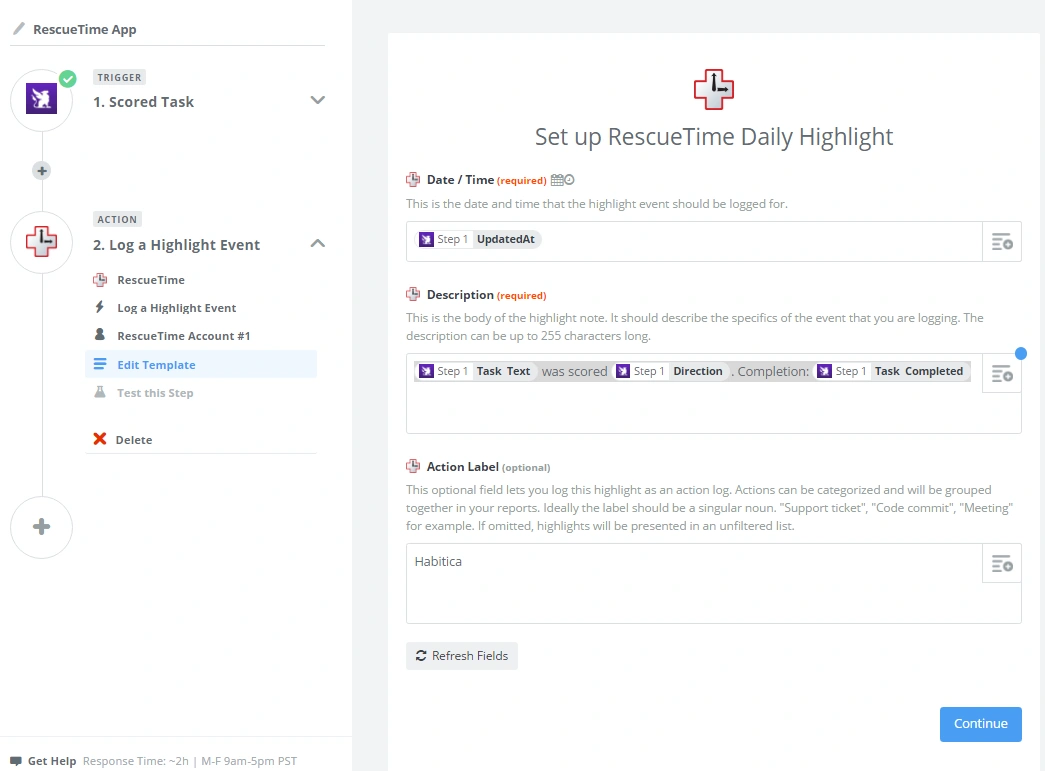
Choose RescueTime as the Action App.
Choose Log a Highlight Event. Click Save + Continue.
If not already completed, choose connect to new account and fill out your RescueTime username and password.


